Keurig Mini Instruction Manual: A Comprehensive Guide
Welcome! This comprehensive guide details operation, care, and troubleshooting for your Keurig K-Mini brewer, ensuring delightful coffee experiences consistently.
Carefully review this instruction manual before initial use; it contains vital safety precautions and operational guidance for optimal performance and longevity.
Discover how to maximize your brewer’s features, from simple brewing to cleaning and maintenance, all within these detailed, easy-to-follow instructions.
The Keurig K-Mini is a compact, single-serve coffee maker designed for convenience and space-saving functionality. This brewer offers a streamlined brewing experience, perfect for individuals or small households seeking a quick and easy coffee solution.
Its small footprint makes it ideal for dorm rooms, offices, or kitchens with limited counter space, without compromising on the quality and variety Keurig is known for. The K-Mini is engineered to brew a variety of K-Cup pod beverages, including coffee, tea, and hot cocoa, providing customizable options with minimal effort.
This guide will walk you through every step, from initial setup and operation to maintenance and troubleshooting, ensuring you enjoy consistently delicious brews. The K-Mini prioritizes simplicity, making it accessible for both first-time Keurig users and seasoned coffee enthusiasts. Prepare to experience the convenience of a perfectly brewed cup, tailored to your taste, in minutes!
Unboxing and Initial Setup
Carefully unpack your Keurig K-Mini, removing all packaging materials, including tape and any protective films. Verify all components are present: the K-Mini brewer itself, the water reservoir, and potentially a starter K-Cup pod sample. Inspect the unit for any visible damage that may have occurred during shipping.
Before first use, remove the water reservoir and rinse it thoroughly with fresh water. Locate the cord storage at the back of the brewer and extend the power cord to its full length. Plug the K-Mini into a grounded electrical outlet. It’s crucial to ensure a stable and safe power connection.
Prior to brewing, it’s recommended to perform a preliminary rinse cycle – fill the reservoir and brew a cup of water without a K-Cup pod – to cleanse the internal system. This ensures optimal flavor in your first brewed beverage.
Powering On and Basic Operation
To power on your Keurig K-Mini, simply press the single power button located on the top of the unit. The indicator light will illuminate, signaling the brewer is ready. Allow a short warm-up period – typically less than a minute – before initiating a brew cycle. The brewer automatically shuts off after a period of inactivity, conserving energy.
Basic operation revolves around filling the water reservoir, inserting a K-Cup pod, and selecting your desired brew size. The K-Mini typically offers two brew size options: 6oz and 8oz. Select your preference before starting the brew.
Pressing the same power button again initiates the brewing process. The brewer will automatically draw water, pierce the K-Cup, and deliver hot coffee directly into your mug. Always exercise caution when handling hot beverages and surfaces.
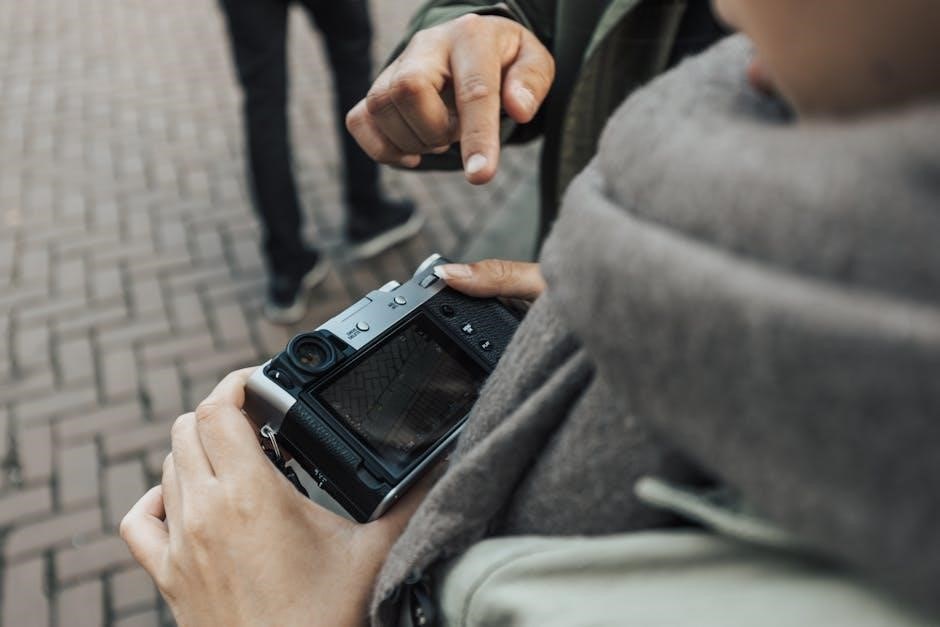
Understanding the Keurig Mini Components
Explore the K-Mini’s key parts: water reservoir, K-Cup holder, drip tray, and power button with indicator lights, for seamless brewing and maintenance.
Water Reservoir
The water reservoir is a crucial component, directly impacting your brew quality and the overall Keurig Mini experience. It’s designed for easy removal, filling, and re-insertion, streamlining the brewing process. Always ensure the reservoir is securely seated before initiating a brew cycle to prevent leaks and ensure proper operation.
Capacity considerations are important; the K-Mini’s reservoir holds a limited amount of water, typically sufficient for one or two cups. Regularly check the water level and refill as needed. Use fresh, filtered water for the best-tasting coffee and to minimize scale buildup within the machine. Avoid overfilling, as this can cause spillage during operation.
Cleaning the reservoir is essential for maintaining hygiene and preventing mineral deposits. Regularly wash it with mild soap and water, rinsing thoroughly to remove any residue. Do not use abrasive cleaners, as they can damage the plastic. A clean reservoir contributes significantly to the longevity and performance of your Keurig Mini.
K-Cup Pod Holder
The K-Cup pod holder is the heart of the Keurig Mini’s brewing system, designed to accommodate single-serve K-Cup pods. It features a piercing mechanism that punctures the pod, allowing hot water to flow through and extract the coffee. Proper pod insertion is vital for a successful brew – ensure the pod is fully seated within the holder.
Regular cleaning of the K-Cup pod holder is crucial to prevent coffee grounds and residue from accumulating, which can affect brew quality and potentially clog the system. After each use, remove and discard the used pod. Periodically, wash the pod holder with warm, soapy water, paying attention to the needle area.
Inspecting the needle for blockages is also important. Use a paperclip or similar tool to gently clear any obstructions. A clean and unobstructed K-Cup pod holder ensures optimal water flow and consistently delicious coffee with your Keurig Mini.
Drip Tray
The drip tray on your Keurig Mini is designed to catch any accidental spills or drips during the brewing process, keeping your countertop clean and protected. It’s a removable component, making it easy to empty and clean. Regularly check the drip tray, especially after multiple brews, to prevent overflow.
Emptying the drip tray is a simple task – carefully remove it from the base of the brewer and dispose of any accumulated liquid. Rinse the tray thoroughly with warm, soapy water, ensuring all residue is removed. Allow it to dry completely before replacing it back onto the Keurig Mini.
Some models may feature a removable drip tray cover for added convenience. Ensure the drip tray is securely in place before brewing to avoid messes. Maintaining a clean drip tray contributes to a hygienic and enjoyable coffee-making experience.
Power Button and Indicator Lights
The Power Button initiates the brewing process and activates the Keurig Mini. A single press turns the unit on, while another press initiates the brew cycle. It’s typically located on the top or front of the brewer for easy access.
Indicator Lights provide crucial information about the brewer’s status. A solid light often indicates the unit is powered on and ready. Flashing lights can signal various states, such as heating up or requiring descaling; Refer to the user manual for specific light patterns and their meanings.
Understanding these lights is key to operating your Keurig Mini effectively. Pay attention to any unusual flashing or changes in light behavior, as they may indicate a problem requiring attention. Always ensure the unit is properly plugged in and the power button is engaged before brewing.
Brewing Your First Cup
Begin your brewing journey! Fill the reservoir, insert a K-Cup, select your desired brew size, and press the button for a perfect cup.
Enjoy the convenience and speed of your Keurig Mini, delivering a fresh, flavorful beverage with minimal effort and maximum enjoyment.
Filling the Water Reservoir
Proper water reservoir filling is crucial for optimal brewing performance with your Keurig Mini. Locate the water reservoir at the back of the brewer; it’s designed for easy removal and refilling.
Lift the reservoir straight up and carefully detach it from the brewer base. Rinse the reservoir with cool, fresh water before each fill to maintain cleanliness and prevent mineral buildup.
Fill the reservoir with the desired amount of filtered water, ensuring you do not exceed the maximum fill line indicated on the reservoir itself. Using filtered water significantly improves the taste of your brewed coffee.
Carefully reattach the filled reservoir to the brewer, aligning it properly with the base until it clicks securely into place. Always ensure the reservoir is firmly seated before initiating a brew cycle to avoid leaks or malfunctions.
Regularly cleaning the reservoir is recommended to prevent scale and maintain water quality.
Inserting a K-Cup Pod
Inserting a K-Cup pod is a straightforward process, essential for enjoying your favorite beverages with the Keurig Mini. Begin by lifting the K-Cup pod holder lid located on the top of the brewer.
Place a K-Cup pod of your choice into the holder, ensuring it sits securely and is properly aligned. The pod should fit snugly within the holder without being forced.
Close the K-Cup pod holder lid firmly, but gently, until it clicks into place. This action pierces the K-Cup pod, preparing it for brewing.
Important: Do not use foil-sealed K-Cup pods, as they may damage the brewer. Ensure you are using K-Cup pods specifically designed for Keurig brewers.
After brewing, carefully lift the lid and dispose of the used K-Cup pod responsibly. Regularly inspect the pod holder for any residue and clean as needed.
Selecting Brew Size
The Keurig Mini offers convenient brew size selection, allowing you to customize your cup to your preference. After inserting your K-Cup pod and filling the reservoir, you’ll choose your desired size.
The Keurig Mini typically features two brew size options: 6oz and 10oz. These options cater to different cup sizes and beverage strengths.
To select your brew size, simply press the brew button repeatedly. Each press will cycle through the available options. The indicator light will illuminate to show your selection.
Consider the K-Cup pod type when choosing a size; some pods are optimized for smaller or larger brews. Experiment to find your ideal strength and volume.
For a stronger, more concentrated flavor, opt for the 6oz brew. For a larger, milder cup, select the 10oz option. Enjoy your perfectly sized brew!
Starting the Brew Cycle
Once the water is heated and your brew size is selected, initiating the brew cycle is straightforward. Ensure the K-Cup pod is securely inserted and the drip tray is properly positioned.
Press the brew button once to begin the brewing process. The Keurig Mini will automatically pierce the K-Cup pod and pump hot water through it, delivering fresh coffee directly into your mug.
The brewing process typically takes under a minute. Observe the indicator lights; they will signal when the brewing is in progress and when it’s complete.
Avoid lifting the handle during brewing, as this could interrupt the cycle and potentially cause hot water to spill. Allow the machine to finish completely.
Once finished, carefully remove your mug and enjoy your freshly brewed coffee. The Keurig Mini will automatically prepare for your next brew!

Maintenance and Cleaning
Regular cleaning ensures optimal performance and longevity of your Keurig Mini. Consistent upkeep prevents mineral buildup and maintains coffee quality.
Follow the outlined procedures for daily rinsing, descaling, and exterior wiping to keep your brewer functioning at its best consistently.
Daily Cleaning Procedures
After each use, promptly remove and discard the used K-Cup pod. Rinse the K-Cup pod holder with warm water, ensuring no coffee grounds remain. This prevents clogging and maintains optimal brew quality.
The drip tray should also be emptied and rinsed daily to prevent overflow and maintain a clean brewing environment. Wipe down the exterior of the Keurig Mini with a damp cloth to remove any spills or splatters.
Periodically, the water reservoir should be removed, rinsed with fresh water, and dried thoroughly before refilling. Avoid using abrasive cleaners or scouring pads, as these can damage the surfaces. Consistent daily cleaning significantly extends the life of your brewer and ensures consistently delicious coffee.
Remember to always unplug the Keurig Mini before performing any cleaning procedures for safety.
Descaling the Keurig Mini
Descaling removes mineral buildup that can affect brew performance and coffee taste. It’s recommended to descale every 3-6 months, depending on water hardness. Use Keurig’s Descaling Solution or a mixture of equal parts white vinegar and water.
Pour the descaling solution into the water reservoir and run a full brew cycle without a K-Cup pod. Repeat this process several times, until the “Descale” indicator light illuminates. Allow the unit to sit for at least 30 minutes.
Then, run several brew cycles with fresh water only to thoroughly rinse the system. This removes any residual descaling solution, ensuring your coffee tastes pure and clean. Always follow the instructions on the descaling solution packaging.
Regular descaling maintains optimal brewer function and prolongs its lifespan.
Cleaning the Exterior
Maintaining a clean exterior enhances your Keurig Mini’s appearance and hygiene. Regularly wipe down the brewer’s surfaces with a damp, soft cloth. Avoid abrasive cleaners, as they can damage the finish.
For stubborn stains or spills, a mild dish soap solution can be used, ensuring thorough rinsing afterward. Pay particular attention to the drip tray area, as coffee drips can accumulate and become sticky.
The exterior housing, control buttons, and surrounding areas should be cleaned frequently to prevent buildup. Never immerse the brewer in water or any other liquid.
Ensure the unit is unplugged before cleaning. A clean exterior contributes to a pleasant brewing experience and extends the life of your Keurig Mini.
Cleaning the K-Cup Pod Holder
Regularly cleaning the K-Cup pod holder is crucial for optimal brewing and preventing clogs. After each use, remove and discard the used K-Cup pod. Then, remove the pod holder from the brewer.
Wash the pod holder with warm, soapy water, ensuring all coffee grounds and residue are removed. A small brush can be helpful for reaching tight spaces. Rinse thoroughly under running water.
Inspect the exit needle (the small needle at the bottom of the pod holder) for any blockages. Use a paperclip or cleaning tool to gently clear any obstructions. Never use metal objects that could damage the needle.
Ensure the pod holder is completely dry before reassembling it into the Keurig Mini. A clean pod holder guarantees a fresh and flavorful brew every time.

Troubleshooting Common Issues
Encountering problems? This section provides solutions for issues like the brewer not powering on, water dispensing failures, or suboptimal coffee quality.
Resolve error messages and codes quickly with our guide, ensuring your Keurig Mini delivers consistently excellent results without frustrating interruptions.
Coffee Maker Not Turning On
Problem: Your Keurig Mini fails to power on, preventing you from enjoying a fresh brew. Several factors could contribute to this issue, requiring systematic troubleshooting.

Solutions: First, verify the power cord is securely plugged into both the coffee maker and a functioning grounded electrical outlet. Test the outlet with another device to confirm it’s providing power. If the outlet is fine, inspect the power cord for any visible damage – frays or cuts – and replace it if necessary.
Next, check the power button itself. Ensure it’s being pressed firmly and that there isn’t any debris obstructing its function. Sometimes, a simple reset can resolve the issue; unplug the Keurig Mini for 60 seconds, then plug it back in and attempt to power it on. If these steps don’t work, consult the full user manual for further assistance or contact Keurig customer support, as it may indicate an internal electrical fault requiring professional attention.
Caution: Never attempt to disassemble or repair the coffee maker yourself, as this could void the warranty and pose a safety hazard.
Water Not Dispensing
Problem: Your Keurig Mini isn’t dispensing water during the brewing cycle, resulting in no coffee. This is a common issue with several potential causes that require investigation.
Solutions: First, ensure the water reservoir is properly seated and filled with an adequate amount of fresh water. Confirm it’s correctly aligned and locked into place. Next, check for any blockages in the water reservoir outlet or the entry point into the brewer. Remove the reservoir and inspect for mineral buildup or debris.
If the reservoir and entry points are clear, descale your Keurig Mini. Mineral deposits can accumulate over time, restricting water flow. Follow the descaling instructions in the user manual. Finally, try a water-only brew cycle (without a K-Cup) to flush the system. If the problem persists, consult the manual or contact Keurig support for further assistance.
Caution: Never operate the brewer without water in the reservoir.
Weak or Bitter Coffee
Problem: Your brewed coffee is either too weak, lacking flavor, or excessively bitter, impacting your overall enjoyment. Several factors can contribute to these undesirable outcomes.
Solutions: For weak coffee, try using a smaller brew size or selecting a bolder K-Cup variety. Ensure you’re using enough coffee for the selected size. Conversely, for bitter coffee, consider a lighter roast K-Cup or a larger brew size to dilute the strength.
Water quality significantly impacts taste; use filtered water. Regularly clean your Keurig Mini, as residue buildup can affect flavor. Experiment with different K-Cup brands and types to find your preferred taste profile. Finally, ensure the K-Cup pod holder is clean and free of coffee grounds.
Tip: Adjusting these variables will help you achieve the perfect cup.
Error Messages and Codes
Understanding Error Codes: Your Keurig Mini utilizes error messages to indicate specific issues requiring attention. These codes help diagnose problems quickly and efficiently, minimizing downtime and ensuring optimal performance.
Common Codes: A “Descale” message indicates mineral buildup, requiring descaling. “Add Water” means the reservoir is empty or not properly seated. A “K-Cup Pod Issue” suggests a problem with pod insertion or recognition. If you encounter a flashing light or an unfamiliar code, consult the full user manual for a comprehensive list.
Troubleshooting: Refer to the manual for specific instructions related to each code. Often, simply restarting the brewer or reseating the water reservoir resolves the issue. If the problem persists, contact Keurig customer support for assistance.
Advanced Features and Tips
Explore versatility! Utilize reusable filters for cost savings and eco-friendliness, or craft refreshing iced beverages with ease and convenience.
For travel, ensure the brewer is cool, dry, and secured; enjoy consistent coffee quality wherever your adventures take you!
Using Reusable K-Cup Filters
Embrace sustainability and cost savings by utilizing reusable K-Cup filters with your Keurig Mini! These filters allow you to brew with your favorite ground coffee, eliminating the need for disposable K-Cup pods and offering greater control over your coffee selection.
To use a reusable filter: Carefully open the K-Cup pod holder. Insert the reusable filter into the holder, ensuring it sits securely. Add your desired amount of ground coffee – typically one to two tablespoons, adjusting to your taste preference. Close the K-Cup pod holder firmly.
Brew as usual! Select your desired brew size and initiate the brewing cycle. Remember to clean the reusable filter thoroughly after each use to prevent buildup and maintain optimal flavor. Regular cleaning ensures a consistently delicious cup of coffee and prolongs the life of your filter. Explore different coffee grinds to find your perfect brew!

Brewing Iced Beverages
Beat the heat with refreshing iced coffee brewed directly from your Keurig Mini! Achieving the perfect iced brew requires a slight adjustment to the standard brewing process to account for dilution from the ice.
Here’s how: Fill a mug with ice to your desired level. Select a brew size slightly smaller than you normally would, as the melting ice will add volume. Place the mug filled with ice onto the drip tray. Initiate the brew cycle as usual.
For stronger iced coffee, consider using the “Strong” brew option if your model has one, or use a darker roast coffee. Experiment with different coffee-to-ice ratios to find your ideal strength and flavor. Enjoy a cool, convenient, and flavorful iced beverage anytime!
Travel Tips for Your Keurig Mini
The Keurig Mini’s compact size makes it an ideal travel companion! Before hitting the road, ensure the unit is completely cool and dry. Carefully wrap the power cord and store it securely to prevent damage during transit.
Protect your brewer by placing it in a sturdy box or carrying case, cushioned with packing materials. Consider bringing a small, resealable container of bottled water to ensure access to clean water when traveling to areas with questionable water quality.
Remember to pack K-Cup pods or a reusable filter for your favorite coffee. Always check airline regulations regarding small appliances before traveling. Enjoy convenient coffee wherever your adventures take you!
Safety Precautions
Always prioritize electrical safety and avoid immersing the brewer in water. Beware of hot surfaces during and after brewing, and follow usage guidelines carefully.
Electrical Safety
To ensure safe operation, always plug your Keurig Mini into a grounded electrical outlet. Never operate the appliance with a damaged cord or plug, and avoid using extension cords if possible.
Do not immerse the coffee maker, cord, or plug in water or other liquids, as this presents a significant electrical shock hazard. If the appliance malfunctions or shows signs of damage, immediately unplug it from the outlet.
Regularly inspect the power cord for any signs of wear or damage. If damage is detected, discontinue use and contact Keurig customer support for assistance. Never attempt to repair the appliance yourself, as this could create a safety risk.
Always unplug the Keurig Mini before cleaning or performing any maintenance. This prevents accidental activation and potential electrical shock. Keep the appliance away from heat sources and flammable materials.
Hot Surface Warnings
Caution: During and immediately after brewing, surfaces of the Keurig Mini become extremely hot. Avoid touching the heating element, nozzle, and surrounding areas to prevent burns.
Always allow the coffee maker to cool down completely before attempting to clean or move it. Use caution when handling hot K-Cup pods and freshly brewed coffee, as they can cause scalding.
Keep the appliance out of reach of children and pets to prevent accidental contact with hot surfaces. Supervise children closely when the Keurig Mini is in operation.
Be mindful of steam escaping from the brewer during the brewing cycle. Avoid placing your hands or face directly in front of the steam vent. Use pot holders or oven mitts when handling hot components.
Never touch the drip tray immediately after brewing, as it may contain hot liquid residue.

Proper Usage Guidelines
Ensure the Keurig Mini is placed on a stable, level surface before operation. Only use fresh, cold water in the reservoir, avoiding any other liquids.
Always use K-Cup pods specifically designed for Keurig brewers. Do not attempt to use empty pods or those not compatible with the system.
Regularly descale your Keurig Mini to maintain optimal performance and prevent mineral buildup. Follow the descaling instructions provided in this manual;
Never overfill the water reservoir or K-Cup pod holder. Adhere to the maximum fill lines indicated on each component.
Avoid immersing the brewer in water or any other liquid. Clean the exterior with a damp cloth only. Unplug the unit before cleaning.
Do not operate the Keurig Mini with a damaged cord or plug.